35 | Let's Put Spring On a Plate
Signs of spring are everywhere, and I’m excited to enjoy all the amazing fresh produce that comes with the season! Gardens are producing tender young sprouts and farmers’ markets are starting up again. With the warmer spring days but still chilly nights, it’s the best of summer and winter combined. That makes it the perfect time for a fresh yet warming meal, starting with a cheerful soup and ending with a zesty dessert. This springy feast is full of colorful veggies, brightened with tangy lemon, and infused with fresh herbs. Let’s make the most of the bountiful spring goodness! Start here with the shopping list.
1 | Main Dish
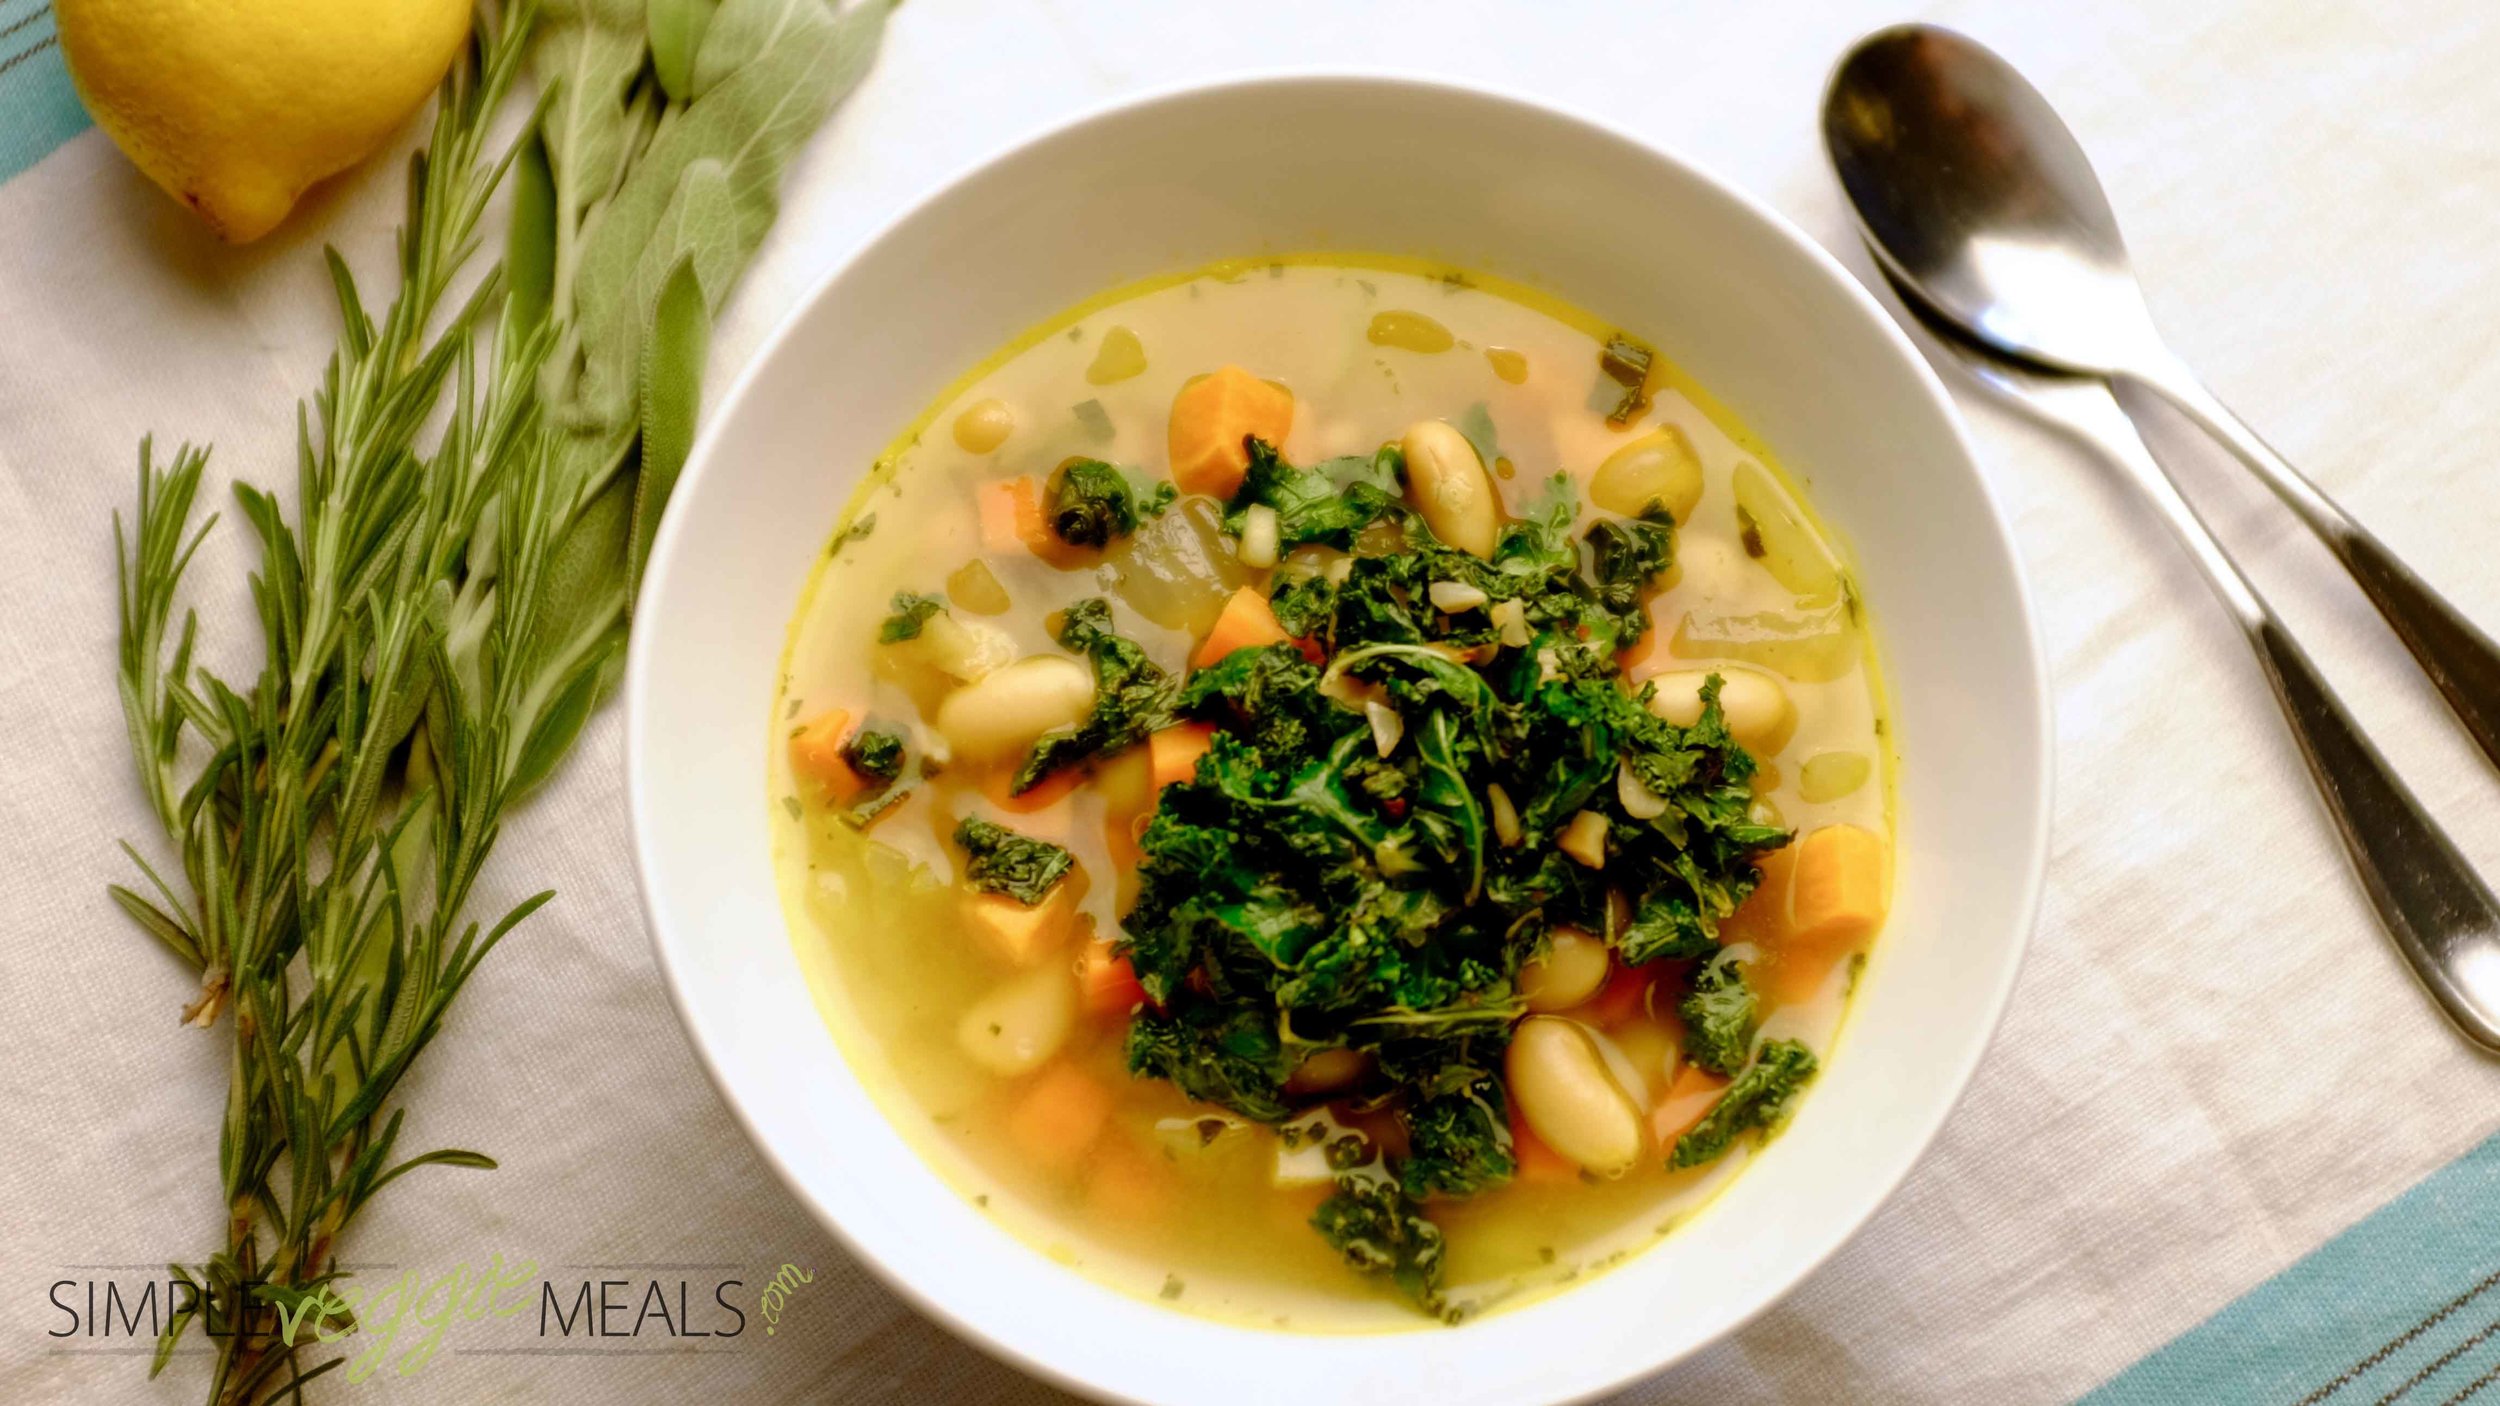
Spring Veggie Soup
This week the sun flooded my kitchen, inspiring me to make a colorful, cheerful soup. Full of fresh veggies, it’s also a healthy choice to ward off the last of the winter germs. The white beans provide protein, and the kale is packed with vitamins and minerals. Adding fresh rosemary and sage, along with just a hint of heat, makes this no ordinary veggie soup.
3 | Side
Tarragon Ricotta on Toast
Any meal benefits from having a variety of texture, which makes toast a wonderful companion to soup. Top some crunchy toast with this creamy tarragon ricotta spread, dip into the Spring Veggie Soup, and you’ve got yourself a meal. On its own, this side would be a quick appetizer for your next party, and it’s great as a snack, too.
2 | Salad
Zesty Squash Ribbons
In the spring, I’m drawn to fresh, light, bright food, and this salad fits the bill. It only takes a few simple ingredients to elevate the delicate flavors of zucchini and yellow squash into an easy but impressive salad. Zesty lemon juice lightly pickles the ribbons of squash and basil, and peas give a hint of sweetness. It looks and tastes like spring on a plate.
4 | Dessert
Old Fashioned Lemon Bars
For some reason, I associate these bars with spring. Maybe it’s their daffodil-yellow color or because to me they just taste cheerful. The ingredients are simple, mostly staples you probably already have in your pantry. And although they take a little while to bake, these bars are even better the next day, so they’re perfect to make ahead and have on hand.
We all eat, and it would be a sad waste of opportunity to eat badly.
~Anna Thomas
INSTRUCTIONS
1 | Main Dish
Spring Veggie Soup
2 tablespoons olive oil
1 large onion, chopped
2 medium carrots, chopped
1 celery stock, chopped
1 medium sweet potato, peeled and chopped
1 tablespoon sage, chopped
1 teaspoon rosemary, finely chopped
1/4 teaspoon salt
2 cans white beans, drained and rinsed (15 ounce cans)
4 cups vegetable broth
6 cups chopped fresh kale
6 garlic cloves, finely chopped
1/4 teaspoon red pepper flakes
1 tablespoon lemon juice
Want to make this dairy or gluten-free? Enjoy this simple soup; it's already gluten and dairy-free.
Make ahead option– The soup and kale topping can be stored for up to five days in a sealed container in the fridge. To freeze, stir the kale into the soup and freeze it in small freezer proof containers.
The Simple Steps...
1. Heat a medium pot over medium heat. Add the olive oil to the pan and sauté the onions, carrots, celery, and sweet potato for 4 minutes.
2. Add the finely chopped rosemary and sage. Stir in the salt and sauté everything for two more minutes.
3. Add the drained and rinsed white beans and the vegetable broth. Cook this soup for 10-15 minutes over medium high heat.
4. While the soup is cooking, heat a large pan over medium heat. Add one tablespoon olive oil to the hot pan. Stir in the kale, chopped garlic, and red pepper flakes. Sauté the mixture for about 4-5 minutes. Stir in 1/4 teaspoon salt. After another 1-2 minutes, stir in the lemon juice. Remove this from the heat.
5. To serve, ladle the soup into a bowl and top with the spicy kale mixture. It’s also awesome with some toasty bread to dunk into the warm broth.
Sage leaves can be chopped like basil. Watch this quick tip video for help.
2 | Salad
Zesty Squash Ribbons
2 small zucchini
1 small yellow squash
1 garlic clove, minced
1/4 teaspoon salt
2 tablespoons olive oil
2 tablespoons lemon juice
1/3 cup fresh chopped basil
a dash of freshly ground black pepper
1 cup frozen or fresh peas
top with lemon zest and basil
Want to make this dairy or gluten-free? This dish is already gluten and dairy-free.
Make ahead option– This dish is quick to make, but making it 5-8 hours ahead of time can help with the pickling.
The Simple Steps...
1. Wash and slice the squash and zucchini into long thin ribbons. use a vegetable peeler or mandolin if you have one.
2. In a large mixing bowl, mash the garlic and salt together to form a kind of paste. Stir in the olive oil.
3. Add the lemon juice, fresh basil, and pepper to the mixing bowl. Add the veggie ribbons to the bowl and toss everything together to coat it in dressing.
4. Rinse the peas in warm water and add them to the bowl.
5. To serve, place some salad onto a plate and top with more basil and some lemon zest.
3 | Side
Tarragon Ricotta on Toast
8 thick slices of ciabatta bread
2 cups ricotta (15 oz tub)
4 tablespoons fresh tarragon, finely chopped
2 garlic cloves
1/2 teaspoon salt
dash of black pepper
4 tablespoons honey
4 tablespoons olive oil
Make ahead option– This simple side is also a great snack or appetizer for a party. The bread can be toasted ahead of time. The rest of this dish is so quick you could easily make more on a moments notice.
The Simple Steps..
1. Preheat the oven to 450˚. Slice the ciabatta bread into 1/2 inch thick slices and toast for 5-7 minutes. The bread should be very lightly toasted not brown.
2. Lightly brush each slice with a little olive oil. Peel one garlic clove and cut the end off. Rub this exposed end onto the oiled side of the toasted bread. Repeat for all the toasted bread. The crisp bread acts sort of like sandpaper to the garlic leaving little pieces of garlic on the toast. Be careful not to rub too much. If you love garlic, you can always add more.
3. Chop the tarragon and mix it with the ricotta in a small bowl. Stir in the salt and pepper.
4. To serve, spoon a few tablespoons of ricotta on a slice of toast and drizzle it with honey. Continue this step with all the toast and ricotta and honey. If you love honey like my husband, feel free to drizzle the ricotta toast with even more!
4 | Dessert
Old Fashioned Lemon Bars
Crust:
1/4 cup sugar
6 tablespoons butter, softened
1/4 teaspoon salt
1 cup flour
Lemon Filling:
2 eggs
3/4 cup sugar
2 tablespoons flour
1/4 teaspoon baking powder
1 teaspoon lemon zest
3 tablespoons lemon juice
Make ahead option– Keep these at room temperature for serving. Store them in a container on the counter for a week. Or make them ahead and store them in an airtight container or freezer bag in the refrigerator for 2 weeks, or the freezer for up to two months.
The Simple Steps...
1. Preheat the oven to 350˚. In a medium mixing bowl, mix the sugar, soft butter, and salt together. If you have a mixer, beat it together until it’s light and fluffy for about 2 minutes. Then stir in the flour. The dough should be dry.
2. Dump the dough into an 8 X 8 square baking dish and pat it into the bottom. Bake this for 15 minutes.
3. While that’s baking, make the filling. Add all the filling ingredients to a medium mixing bowl, and beat it together for 3 minutes. You can use the same egg beaters, but make sure they are cleaned. The oil from the butter can effect the eggs and keep them from getting fluffy.
4. Gently pour the filling onto the baked crust. Place it back in the oven and bake it for another 25 minutes or until the edges are light golden brown and the center is set.
5. Allow the bars to cool slightly before sifting powdered sugar on the top. Slice and serve.
QUICK TIP
Spring Cleaning Your Kitchen –
Now is the time of year many people do their major cleaning projects. While you go through your list of the things that need cleaning, don’t forget to go through your pantry, refrigerator, and freezer.
• Look at the expiration dates on your condiments and jams.
• Throw out herbs that don’t smell or taste right.
• In the pantry, smell or taste your oils and flours too. If they smell or taste rancid or otherwise unpleasant, it may be time to throw them out. Keep oils and flours in a cool, dry place. Also make sure you have a tight fitting lid to keep the air and other contaminates out.
WHAT DID YOU THINK?
Please let me know what you think of this meal plan. I appreciate hearing from you. What is your favorite way to enjoy spring vegetables?
Please share your thoughts. Post your comments her or here on Facebook.


